Entrées

Video: Competition Style St. Louis Spareribs

[responsive_youtube SXIE_RZNemI]

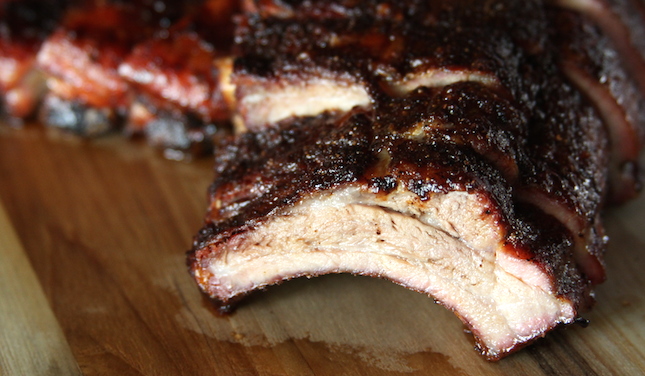
Chef Tom walks you through our process for trimming, seasoning, smoking and saucing competition style ribs. This is our recipe for every KCBS competition we cook (when we have time), and has done well for us landing us in the top 10 on more than one occasion.


Competition Style St. Louis Spareribs


Ingredients


[display_magento_products]

Instructions


Trim the ribs into an evenly shaped rectangle. Remove the end bones, especially where the bone has been cut in half and has a sharp edge protruding. On the bone side of the rack, remove any excess meat or fat to make a flat even surface. Then remove the parchment layer from the backside of the ribs by taking a paper towel and rubbing at the corner until the parchment layer starts to peel up. Grab hold of the membrane with the paper towel and pull to separate from the rack. Look for any areas of excess fat than can be trimmed down to expose the meat on either side of the ribs.

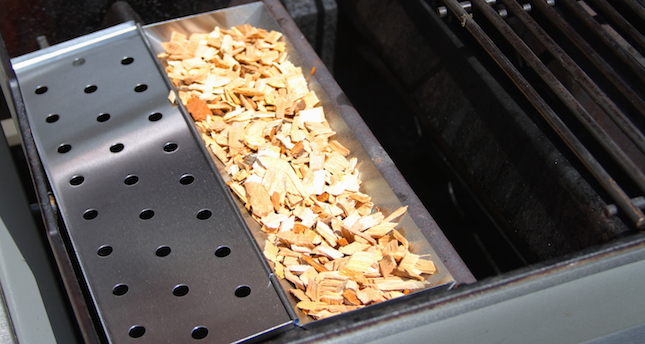
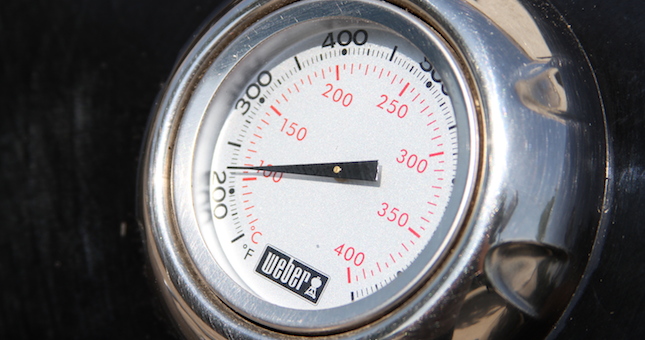
Preheat your Yoder Smokers YS640 to 275ºF.

Apply a small amount of yellow mustard to the bone side of the ribs. Rub the mustard around to cover all surfaces. Combine one part R Butts R Smokin’ Ozark Heat BBQ Rub to one part R Butts R Smokin’ Butt Kick’n Chicken BBQ Rub. Mix well. Apply a moderate amount of the rub to the surface of the ribs. Rest a few minutes to allow the rub to attach to the meat. Flip the rack over and repeat the process on the meat side of the ribs. Rest 5-10 minutes until the rub has darkened in color and begins to appear moist.

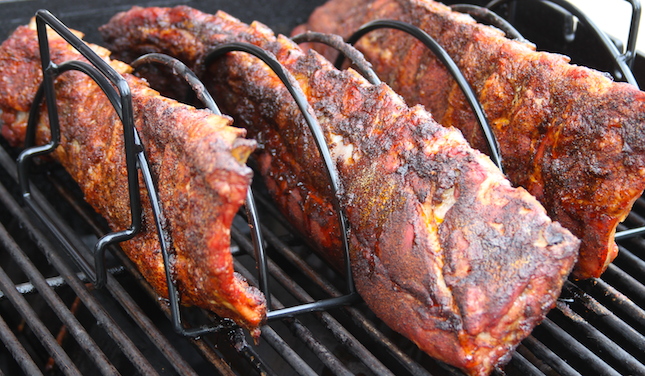
Place the ribs in the smoker, rib side down, and cook until the ribs have a dark red, rich mahogany color. This will likely take two and a half to three and a half hours, but the color is what will dictate when you’re ready to wrap the ribs.

Remove the ribs from the cooker. Lay out two sheets of foil that are large enough to wrap a rack of ribs. Put a handful of brown sugar and some honey in the center of the foil. Place a rack of ribs meat side down on the brown sugar and honey. Season the bone side of the rack with more of the R Butts R Smokin’ rub mixture. Then add another handful of brown sugar and more honey to the ribs. Carefully double wrap the rack tightly, leaving no room for steam to form in the foil.

This recipe was prepared on a Yoder Smokers YS640 Pellet Grill.


Return the ribs to the cooker, meat side down this time. Continue cooking another 1-2 hours. After an hour begin to check for doneness. First check by simply picking up the foil wrapped ribs. If the rack is rigid, doesn’t bend, it’s not done yet. If there is a good amount of flexibility, open the package to examine the ribs. The meat should be shrunken from the ends of the bones, exposing the bone ends. If you look at end of the bone and twist the meat, the meat should move freely from the bone. If the meat is attached and moving with the bone, return to the foil and continue cooking.

Just before removing your ribs from the cooker, combine equal parts Plowboys BBQ En Fuego, Firebug Grilling Sauce Mild BBQ Sauce and Texas Pepper Jelly Apple Habanero Texas Rib Candy in a sauce pan. Warm the sauce. Do not boil.

Immediately after removing the ribs from the smoker, open the foil package and brush on a thin layer of the sauce. Flip over and do the same on the meat side. Tent the foil around the ribs and rest 10 minutes.

Remove the ribs from the foil package and place on a cutting board, meat side down. Carefully slice between the bones. Take care to slice the ribs as straight and even as possible. Flip the ribs over and touch up any blemishes by lightly brushing a little more sauce on. Transfer to your prepared box for turn in.

Grilled Steak Dinner for Two

Grilled Steak Dinner for Two

Get set for a romantic Valentine's with this simple dinner for two. We're grilling strip steaks, topping them with a delicious compound butter and mushrooms along with some angel hair pasta. It's not difficult to dress up steak and pasta with a few easy tricks!


Grilled Steak Dinner for Two Recipe


Ingredients


    For the Italiano Compound Butter:
  • 8 oz unsalted butter, room temperature

  • 1/4 cup finely grated parmesan cheese

  • 2 tbsp freshly squeezed lemon juice

  • 2 tsp Cattleman’s Grill Italiano Seasoning

  • 1 clove garlic, minced


[display_magento_products]

Instructions


Combine all ingredients for the Italiano Compound Butter in a bowl, and mix well until all ingredients are incorporated. Place the compound butter in the center of a sheet of plastic wrap. Wrap the plastic around the butter and form into a log, twisting the ends of the plastic to fully encase the butter. Place in the refrigerator to firm.

Preheat your Yoder Smokers YS640s Pellet Grill to 425ºF, set up for direct grilling with GrillGrates. Also, place a Lodge 10” Cast Iron Skillet in the cooker to preheat. When the skillet is hot, add a few pats of the Italiano Compound Butter and let melt. Then, add the diced mushrooms and about 1 tablespoon of Cattleman’s Grill Italiano Seasoning. Cook until mushrooms are softened, about 15-20 minutes, stirring occasionally. Meanwhile, cook your pasta to the desired doneness, toss with a little olive oil, the 2 tablespoons of parmesan and hold warm.

You may also like: Molten Lava Cake


Rub the strip steaks with a little oil, then season with Kansas City's Cowtown Steak and Grill Seasoning on both sides. Grill on the GrillGrates, both sides, until the internal temperature reaches 125ºF-130ºF for a medium rare-medium finish. You can check the internal temperature with a digital thermometer, like the Maverick PT-75. A minute before removing the steaks from the steaks from the grill (a few degrees shy of your goal) place a couple of pats of the compound butter on each steak.

Serve the steak and pasta topped with the diced mushrooms.

Grilled Steak Dinner for Two

A compound butter is simply butter with flavoring agents mixed in. In this case, we're using Cattleman's Grill Italiano Seasoning, lemon, garlic, and parmesan. These flavors will complement the beef and pasta in the best possible way!

Grilled Steak Dinner for Two

After mixing the ingredients, you can create your own packaging for easy storage and later use.

Grilled Steak Dinner for Two

Wrapped in plastic, the butter is kept fresh. Shaping it into a log makes it easy to slice off a pat at a time as you need it.

Grilled Steak Dinner for Two

This recipe will yield more than you'll need for one meal, but you'll appreciate that later.

Grilled Steak Dinner for Two

To add overall depth of flavor to the dish, we're cooking some mushrooms (in the compound butter, of course) to top the steaks and pasta.

Grilled Steak Dinner for Two

Simply seasoned steaks are always a winner. A little rub goes a long way to bring out the natural flavor of the beef.

Grilled Steak Dinner for Two

Grilled Steak Dinner for Two

Grilled Steak Dinner for Two

Recipes: Pancetta Pizza on Kamado Joe

Pancetta Pizza Kamado Joe

See what happens when we combine the efficiency of the Kamado Joe ceramic charcoal grill with even heat distribution of a cast iron plate setter. It's the perfect set up for grilling pizza, and you can do it directly on the plate setter! All of you ceramic grill enthusiasts, check it out!


Pancetta Pizza Recipe


Yield: 2 pizzas, about 6 servings

Ingredients


[display_magento_products]

Instructions


Start with mixing your pizza dough. This recipe will yield enough dough for 3 pizzas. You can freeze leftover dough for future use. Pour the warm water into the bowl of a stand mixer. Sprinkle the yeast over the water. Add the flour, then the salt. With the mixer fitted with the hook attachment, mix on medium-low until flour is incorporated (1-2 minutes). Once all ingredients are incorporated and a ball is formed mix 8 minutes. Transfer to an oiled bowl. Cover with plastic wrap. Let rise until doubled in size. Turn out onto a floured surface and divide into three portions. Roll each third into a ball, place in an oiled container. Cover. Refrigerate at least half an hour before use.

Preheat your Kamado Joe or other ceramic grill to 375ºF with a Cast Iron Plate Setter or pizza stone for Kamado Joe installed with the grill side up.

Stretch or roll out a dough ball to about 10” in diameter. It should be fairly thin. Transfer the dough to a floured (or corn mealed) pizza peel.

Place enough Mama Capri Sauce on the dough to cover the surface and spread evenly. Top the sauce with half of the fresh oregano leaves. Lay out half of your pancetta slices. They should cover the most of the surface. Top the pancetta with the half of your sliced jalapeños and diced mozzarella. Top with half of the parmesan. Finally, sprinkle Cattleman’s Grill Italiano Seasoning over the entire pizza.

Bake directly on the cast iron plate setter until the bottom is browned and cheese is melted. Be careful not to get the grill too hot, as it will heat the cast iron to the point that it will burn the bottom of the pizza before the top is cooked.

Pancetta Pizza Kamado Joe

Pancetta Pizza Kamado Joe

Pancetta Pizza Kamado Joe

Super simple, four ingredient pizza dough. Keep this recipe on hand. We've been developing this recipe/technique for some time, and really love where it has ended up!

Pancetta Pizza Kamado Joe

The rich, pungent aroma of fresh oregano is a must on pizza!

Pancetta Pizza Kamado Joe

Pancetta Pizza Kamado Joe

Pancetta Pizza Kamado Joe

Pancetta! It's Italian bacon, made from pork belly. Similar to our bacon here in the states, but usually sliced much thinner, which makes it great for melting into a pie!

Pancetta Pizza Kamado Joe

Pancetta Pizza Kamado Joe

Pancetta Pizza Kamado Joe

Video: Chicken Cordon Bleu

[responsive_youtube rFrdDXQT1hQ]

This spin on Chicken Cordon Bleu on the grill is perfect for weeknight dinner.


Chicken Cordon Bleu Recipe


Ingredients


[display_magento_products]

Instructions


Using a good boning knife, slice the breasts in half length wise. Place each breast half in a zip top bag one at a time, and using the flat side of a mallet, pound them out trying to keep them as uniform as possible. The thickness should be around 1/4 inch.

Place the breasts in a container for marinading with the Smoke on Wheels BBQ Marinade. Marinate the meat for half an hour.

Place your panko bread crumbs in a large bowl. Remove each piece of chicken from the marinade and place it in the panko. Coat well and shake off any excess. Transfer to your work surface.

Season the breasts with Cattleman's Grill Tri-Tip Seasoning, then place a half slice of ham on the chicken breast. Roll up one slice of Swiss Cheese into a log and place it in the middle of the breast. Roll the chicken around the ham and cheese and transfer to sheet pan, seam side down.

Preheat your Yoder Smokers YS640 to 350ºF. Bake the chicken until it hits an internal temperature of 160ºF (test internal temperature with an instant read thermometer like the Maverick PT-75). This should take 30 to 45 minutes. Slice and serve immediately.

This recipe was prepared on a Yoder Smokers YS640 Pellet Grill.


Recipes: Fried Oyster & Hot Link Po' Boy

Fried Oyster & Hot Link Po' Boy

We're less than a week away from Fat Tuesday, so why not whip up a Cajun favorite in celebration of Mardi Gras?! Certainly, there are plenty of culinary traditions to choose from, but when a sandwich is an option, you can bet I'm picking the sandwich. The Po' Boy is a classic with so many variations that it's hard to choose just one. That's how we ended up with the Fried Oyster AND Hot Link Po' Boy! And the beauty is, by utilizing the versatility of the Napoleon Prestige, you can do it all on the grill. And we did.


Fried Oyster & Hot Link Po’ Boy Recipe


Yield: 2 servings

Ingredients


  • 12 oz shucked oysters

  • Code 3 Spices Sea Dog Rub

  • 1 cup yellow cornmeal

  • 1/2 cup flour

  • 1/2 cup buttermilk

  • 1 jumbo hot link or 2 smaller hot links

  • 1 (12 inch) french bread sandwich loaf

  • shredded lettuce

  • pickles


[display_magento_products]

Instructions


Preheat a Lodge Logic 7 Quart Dutch Oven filled with 2” vegetable oil over the side burner of your gas grill. Using a digital thermometer, monitor the temperature of the oil. You’re shooting for 350ºF. When you get to that temperature, make sure to turn the heat down to maintain the 350ºF temperature. Also, preheat the main cooking chamber, medium-high heat. We’re cooking the entire recipe on a Napoleon Prestige Pro 665.

Combine the aioli ingredients. Mix well with a spatula. Store in the refrigerator.

Season the oysters liberally with Code 3 Spices Sea Dog Rub. Combine the corn meal and flour in one bowl and pour the buttermilk in another. Toss the oysters in the corn meal mixture, then dunk in the buttermilk, then coat with the corn meal mixture again.

Place your hot link(s) on the grates in the main cooking chamber. Grill to an internal temperature of 165ºF.

While the hot links are grilling, place half of your breaded oysters in the dutch oven. Fry just until golden brown, about 3 minutes. Carefully remove from the oil and place on a paper towel lined plate. Sprinkle with a little salt. Repeat with the other half of the oysters.

Slice the cooked hot link into quarters, lengthwise, for large link, or in half for smaller links. Build your sandwich. Start with a bed of shredded iceberg lettuce, topped with pickles. Lay the hot links over the veggies, and the oysters over the hot links. Top with the aioli.

This recipe was prepared on a Napoleon Grills P500.


Fried Oyster & Hot Link Po' Boy

Building the components. This Cayenne Aioli is icing on the cajun cake!

Fried Oyster & Hot Link Po' Boy

Grab some shucked oysters from the local sea food shop and save yourself a headache. Season liberally!

Fried Oyster & Hot Link Po' Boy

Using buttermilk as a part of the breading process adds richness and makes for a great texture.

Fried Oyster & Hot Link Po' Boy

Fried Oyster & Hot Link Po' Boy

All breaded up and ready to go!

Fried Oyster & Hot Link Po' Boy

At 350ºF frying temperature, these tender oysters go quick, so keep an eye on them.

Fried Oyster & Hot Link Po' Boy

Fried Oyster & Hot Link Po' Boy

Fried Oyster & Hot Link Po' Boy

Recipes: Chipotle Barbecue Chicken Wings with Cilantro Buttermilk Dressing

Chipotle Barbecue Chicken Wings

You know them, you love them and they are king of the game day spread. With the big game nearly upon us, it's time to plan the party food menu, and we'd highly recommend you kick up the wing game another notch with these chile infused, sweet barbecue chicken wings.


Chipotle BBQ Chicken Wings with Cilantro Buttermilk Dressing Recipe


Ingredients


    For the Cilantro Buttermilk Dressing:


  • 3/4 cup sour cream

  • 1/2 cup buttermilk

  • 6 tbsp mayonnaise

  • 1/4 cup fresh cilantro, minced

  • 1 tbsp fresh lime juice

  • 1 tbsp fresh chives, minced

  • 1 clove garlic, minced

  • Kosher salt and black pepper, to taste


[display_magento_products]

Instructions


If using whole wings, cut off the tips and discard, then separate the two wing pieces by cutting at joint in the space between where the bones meet. Place the wings in a Briner Bucket. Add equal parts Sweetwater Spice Tres Chiles Fajita Bath and water to the bucket, enough to cover all wings. Lock the plastic plate in place to keep the wings submerged. Place in the refrigerator for 30-60 minutes.

While the chicken soaks, combine all ingredients for the Cilantro Buttermilk Dressing in a blender. Blend until smooth. Store in the refrigerator.

Preheat your Yoder Smokers YS640 to 425ºF, set up with GrillGrates.

Remove the wings from the liquid. Pat dry with paper towels. Season all surfaces with Cattleman’s Grill 8 Second Ride Carne Asada Seasoning.

Grill the wings on both sides to achieve nice browning. Use an instant read thermometer to monitor the internal temperature. When the wings get to 150ºF, brush the tops with Chile Slinger Chipotle BBQ Sauce. Flip and brush the other side. Remove from the cooker when the internal temperature reaches 165ºF. Serve hot with the Cilantro Buttermilk Dressing for dipping.

This recipe was prepared on a Yoder Smokers YS640.


Chipotle Barbecue Chicken Wings

Usually, the best deal on chicken wings means going home with whole wings, and that's totally fine. You can cook them whole, or separate them like we've done here.

Chipotle Barbecue Chicken Wings

Simply work your knife in between where the pieces meet at each joint. The bones will guide you on a path through the joint that requires cutting through little-to-no bone. If you do take off the end of the bone just be sure to discard any small bone fragments, so no one ends up chewing on them.

Chipotle Barbecue Chicken Wings

Love this Briner brining bucket for these tasks. The plastic lid that locks into place takes the worry out of trying to keep your meat submerged.

Chipotle Barbecue Chicken Wings

Chipotle Barbecue Chicken Wings

There's really not much to this very tasty Cilantro Buttermilk Dressing. Its flavors mingle really well with the sweet and mild spiciness of the wings. Plus, if you have leftovers you can always throw it on a salad the next day.

Chipotle Barbecue Chicken Wings

Chipotle Barbecue Chicken Wings

Chile bump #2 with Cattleman's Grill Carne Asada Seasoning! This is a good time to decide how spicy you like your wings. Go a little lighter if you need to feed the masses, or coat them well for a spicier finish.

Chipotle Barbecue Chicken Wings

After the wings get some color, when the internal temperature passes 150ºF, you can brush on some of the Chile Slinger Chipotle BBQ Sauce, for our final touch of chile flavor. Don't try to do this any earlier in the cooking process, as the sugars might scorch and create a bitter flavor.

Chipotle Barbecue Chicken Wings

Chipotle Barbecue Chicken Wings

Recipes: BBQ Chicken Quesadillas

BBQ Chicken Quesadillas

Spatchcock chicken and Mexican food, two of our favorite foods, come together in this recipe for a sweet and savory twist on quesadillas. And, as always, it can be done start to finish on the grill!


BBQ Chicken Quesadillas Recipe


Yield: Makes 12 small quesadillas

Ingredients


[display_magento_products]

Instructions


Preheat your cooker to 325ºF. Prepare the chicken spatchcock style by cutting out the backbone with poultry shears and pressing the bird flat.

Inject the meat all over with Butcher BBQ Bird Booster Chipotle Injection. The bird should hold about 1 cup of the injection liquid.

Pat dry with paper towels. Season under the skin with R Butts R Smokin’ Butt Kick’n Chicken BBQ Rub. Place on a foil lined sheet pan, skin side up. Cook until the internal temperature reaches 160ºF in the breasts, about 75-90 minutes.

Remove from cooker. When the bird is cool enough to handle, remove the skin and pull all the meat from the bones. Discard the skin and bones. Reserve the liquid from the bottom of the pan. Chop or shred the meat. Toss the meat in the cooking liquid and Chile Slinger Chipotle BBQ Sauce.

Build your quesadillas. Place the cheese and chicken inside the tortillas. Cook directly on the grill until tortillas are lightly browned and cheese is melted.

BBQ Chicken Quesadillas

If you need a refresher on the spatchcock method, check out our Spatchcock Chicken video, for all the info you'll need to end up with super juicy pulled chicken.

BBQ Chicken Quesadillas

BBQ Chicken Quesadillas

BBQ Chicken Quesadillas

Spaghetti Pizza with Pulled Pork and Italian Sausage

Spaghetti Pizza Recipe

Spaghetti is good. Pizza is awesome. Spaghetti Pizza (Spaghizza) is epic! I feel like most people would make pizza at home more often if it wasn't for the headache of making the dough from scratch or having to go out and find a quality pre-made dough. It's not even that it's all that difficult, but it does require some time and planning.

Enter spaghetti crust. Most of us have spaghetti in the pantry. You might even have some leftover in the fridge. With the addition of a couple of ingredients, you can turn that spaghetti into pizza crust. Check it out!


Spaghetti Pizza with Pulled Pork and Italian Sausage


Ingredients


  • 1/2 lb spaghetti

  • 2 eggs

  • 1/2 cup finely grated parmesan, divided

  • 2-3 tbsp Cattleman’s Grill Italiano Seasoning

  • 2 cups of your favorite pasta sauce

  • 8 oz fresh mozzarella, diced

  • 3 Italian sausage links, cooked, sliced

  • 1 cup pulled pork


[display_magento_products]

Instructions


Preheat your Yoder Smokers YS640 Pellet Grill to 400ºF. Cook the pasta in boiling water until tender. Drain the water. Let cool slightly. While still warm, add the eggs, 1/4 cup of parmesan and 2-3 tablespoons Cattleman’s Grill Italiano Seasoning to the pasta and mix well. Transfer the pasta mixture to a Lodge 15” Seasoned Steel Skillet. Bake the spaghetti “crust” for about 10 minutes. Remove from the cooker.

Top the spaghetti crust with the pasta sauce, sliced sausage links, pulled pork, diced mozzarella and the remaining 1/4 cup of parmesan. Return the skillet to the smoker and continue cooking until the cheese is melted and the bottom is lightly browned, about 40 minutes.

Spaghetti Pizza Recipe

Spaghetti Pizza Recipe

A couple of eggs and some parmesan will bind the pasta and allow it to form a crust for the pizza.

Spaghetti Pizza Recipe

Don't forget the seasoning. Cattleman's Grill Italiano FTW!

Spaghetti Pizza Recipe

Spaghetti Pizza Recipe

Our rendition features hot Italian sausages as well as some leftover pulled pork. Of course, you can choose your favorite toppings.

Spaghetti Pizza Recipe

Spaghetti Pizza Recipe

The Lodge 15" Seasoned Steel Skillet is a perfect vessel for this dish. It distributes heat evenly, giving the crust a nicely browned finished, and it's big enough to feed the whole family.

Spaghetti Pizza Recipe

Spaghetti Pizza Recipe

Video: Spatchcock Thanksgiving Turkey

[responsive_youtube UKB99hc9oTQ]

Chef Tom shows you just how simple a truly fantastic Thanksgiving turkey can be. By spatchcocking, brining and roasting the bird at 325º in our Yoder Smokers YS640 we end up with a wonderful roasted smokey flavor that compliments any other dishes you want to serve alongside your turkey.


Spatchcock Thanksgiving Turkey Recipe


Ingredients


[display_magento_products]

Instructions


Spatchcock the turkey. To take the backbone out, place the bird breast side down. Cut along both sides of the backbone with kitchen shears, from one opening of the cavity to the other.

Combine the one pound bag of Briner Classic Turkey Brine with 6 quarts of water. Whisk well until brine is dissolved. Place the brine and spatchcocked turkey in a large Briner Bucket. Lock the brining plate in place to keep the bird submerged. Refrigerate the turkey in the brine, one pound per hour.

Remove the turkey from the brine. Pat the bird dry with paper towels. Pull the skin away from the meat, but leave it attached. Using the John Henry’s Texas Chicken Tickler, season the meat under the skin for maximum flavor absorption.

Preheat your Yoder Smokers YS640 to 325ºF. Lay the bird flat on a foil lined sheet pan and place the pan in the cooker. At 325ºF, a 12-pound turkey will take about 2 hours to cook. Cook the turkey until all of the meat has reached an internal temperature of 165ºF. It is likely that the legs will cook a bit faster than the breasts. That is fine. However, do NOT cook the breasts past 165ºF. We recommend using an instant-read thermometer like the Maverick PT-75.

The thighs will separate from the rest of the body very easily, just slice through the skin. You can serve the quarters whole, separate the leg from the thigh (by cutting at the joint) or you can pull the meat from the bones and discard the bones. The breasts can either be sliced intact or removed from the breastbone, separated from wings, and sliced to serve. The wings can be served whole or you may remove the skin and pull that meat from the bones.

Until you're ready to serve, store the meat, covered, in a pan with the juices rendered while cooking.

How to Smoke Ribs on a Gas Grill

How to Smoke Ribs on a Gas Grill

Smoking ribs on a gas grill is a challenge, but we love a good challenge, so read on for our step by step guide.


Serving up ribs at a backyard barbecue during the summer is one of the true joys of being a pitmaster. Everyone loves ribs (even if they don't they sure do eat a lot of them when the platter is sitting out), and when they're cooked right they will bring the masses to their knees. One of the problems we run into from time to time is a customer that has a nice gas grill but no smoker and doesn't have the budget or want to spend the money to buy a standalone pit. If that's you, don't worry, we'll have you smoking up amazing ribs in no time flat.

What You'll Need

How to Smoke Ribs on a Gas Grill


How to Smoke Ribs on a Gas Grill

Step One: Insert the stainless smoker box under the grills grates on one side of the pit, setting it on the flame deflectors (sometimes called flavorizer bars) that cover the burners, fill it with wood chips, pour one cup of water on the chips and close the hinged lid of the box.

Do not soak the chips, the idea here is to keep the chips from catching fire, not to soak them until they smolder. We want to produce thin blue smoke, so they will need to burn up fairly quickly. Simply refill the wood chips as needed during the cook. What's most important is getting smoke into the ribs for the first two hours of the cook.

Close the lid on the smoker box and put the grate back in place (or leave it off to make refilling easy). Ignite the burner that your smoker box is resting on, put your rib rack in place, and close the lid of your grill. Do not ignite any other burners. We do not want direct heat under the ribs. The single burner that is burning the wood chips will provide the chamber with the perfect amount of heat to cook the ribs.

How to Smoke Ribs on a Gas Grill

Step Two: While the grill is heating up you will prep your ribs (we cooked three racks of baby backs for this cook) by trimming off any excess fat and pulling the papery membrane from the bone side of the ribs. Apply a small amount of yellow mustard to the ribs and rub with your favorite rib rub. We used three different rubs for this cook; Code 3 Spices 5-0 Rub, 3 Eyz BBQ Rub and Smokin' Guns BBQ Original Hot Rub.

How to Smoke Ribs on a Gas Grill

Your grill will now be nice and hot. Take a little time and adjust the burner so that your grill is holding steady between 225ºF and 250ºF. Once you get the heat where you want it, place your ribs on your rib rack and close the grill lid. This is where it's good to have something else to do because your grill won't need much help maintaining heat or producing smoke. After an hour come back and check on the wood chips. If they need to be refilled, do so. Don't forget to pour some water over the top, we don't want them to catch fire and burn up too fast.

How to Smoke Ribs on a Gas Grill

Step Three: After a couple hours, check on the ribs and make sure your smoker box still has wood chips. If you want more smoke flavor, you can refill the box now, but if you like a more mild smoke there is no need to worry about it. At this point in the cook, the rib meat should start to pull away from the bone. Test for tenderness by trying to move one of the bones toward the center of a rack. It will still be tough to move at this point, but after a couple more hours it will start to swivel in place and the rack of ribs will no longer feel springy.

You may also like: Competition Style St. Louis Spare Ribs


This is a sign that the connective tissue in the meat has started to break down. Once the bone swivels freely and the meat around the bone stays in place your ribs are done. Pull them off and let them rest for a half hour before slicing them up. This will make slicing much easier as the juice in the ribs will redistribute back into the meat from the surface.

How to Smoke Ribs on a Gas Grill

Step Four: Slice the ribs with a nice sharp knife. Having a Victorinox 12" Granton Edge Slicer will make this especially easy as the knife will move through the ribs like butter and the granton edge will release the meat without tearing your bark apart on each cut. Serve these ribs with your favorite barbecue sauce like Firebug Grill'n Sauce Hot. Enjoy!
®2021 All Things Barbecue, LLC. All Rights Reserved